Important! Please read this first!
Important! Please read this
first!
This guide serves as an very basic
introduction to the air brushing of a Bandai Gundam model kit. It is by no means
a definitive guide, and in actual fact skips some essential steps such as the
usage of putty, spraying of a protective layer, etc. I am not a professional,
and only have slightly over a year of air brushing experience. I came up with
this guide at the request of a friend, and decided to go all out and make it a
guide so that more people will be aware of the difference an air brush can make.
So, remember this is a very basic guide, and for those experience modelers, I
have nothing to offer you, and please forgive me if I've made any mistakes. For
those just starting out, try not to follow my guide too much as there are a lot
of other guides which tells you how to sand/file/putty properly. The information
found here is only for introduction that's all.
Credits: Psyke (myself, for using one hand to take pictures as there was no one
to help :), Eden for urging me on to make this guide, and of course Daniel who
was the one to teach me everything I know about air brushing. I know he'll be
mad as I've left out many steps and rushed the process, but well I'm getting
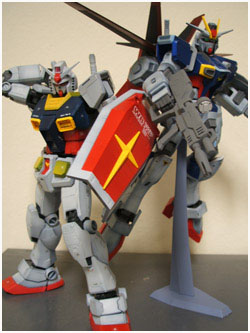
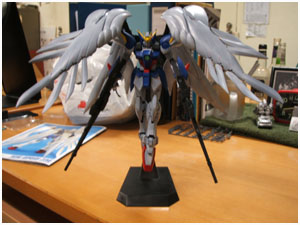
better! Just for your info, the MG Wing Zero Custom you see here was done in 2
days. Daniel would have taken at least 2 weeks to do this. This shows how
impatient I am. ![]()
Feel free to contact me or check out my sites:
Email:
psyke0808@yahoo.com.sg
Website:
http://ultranosekai.50webs.com/
Blog:
http://psyke80.blogs.friendster.com/seankun_no_sekai/

 Step 1:
Cut out the pieces using a hobby knife or a
cutter. Make sure to cut as close to the edge as possible so you will have
lesser to do later.
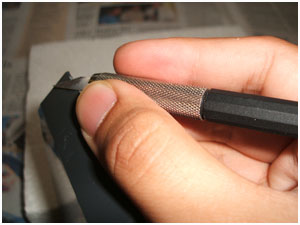
Using a sharp hobby knife, trim or cut off the edges
which the cutter wasn't able to cut off cleanly. Make sure to cut away from you,
so as to prevent any accidents from happening.
Use a soft sandpaper to sand the edge and make sure it is smooth.
 Step
2:
Step
2:
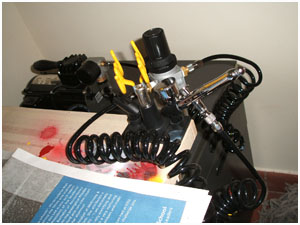
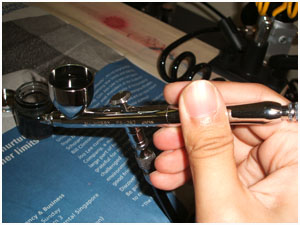
Set up your compressor and airbrush. I recommend getting a fine airbrush, of at
least 0.3mm. Of course, the finer your nozzle, the better it is as your coats of
paint will look smoother. The are various different grades of air brushes out
there, ranging from $80 to even $400. Look for one which will suit your needs,
as not everyone needs such a high end brush.
Make sure you got your water traps set up properly as well. Without these,
you'll start to have condensed water vapor running through your hoses, which is
not good and might cause you to ruin your kit.
 Step 3:
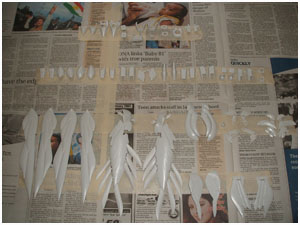
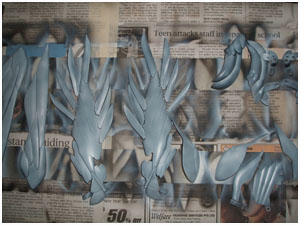
Lay out the pieces which you are about to spray paint
first. In the case of my guide here, I will be applying a coat of black on all
the white pieces first. This is to create the shadow effect later on when you
spray on the white paint. Due to the base coat of black, you can select how much
white you want to apply, and even stop at grey if you like your models to look
more rugged.
Note that this step is completely optional, though there are a few marked
advantages, such as not having the need to use any panel markers later on due to
the undercoat of black paint. It takes more effort and time, but I recommend you
do this step as the results would be much better rather than just spraying the
pieces white.
 Step
4:
Step
4:
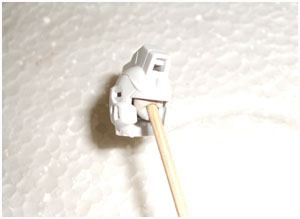
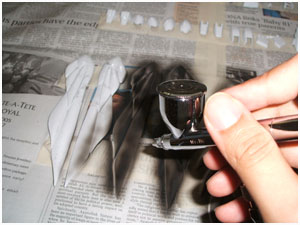
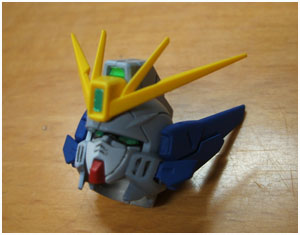
Tip: Not all the pieces should be laid out on the table like the previous picture. As much as possible, join up whole pieces together, such as the head as well as the thighs and arms. This way, you wouldn't need to worry about the co-joining pieces having varying degrees of colors. You can either use a clip or a stick with blue tack to stick on the pieces (see picture).
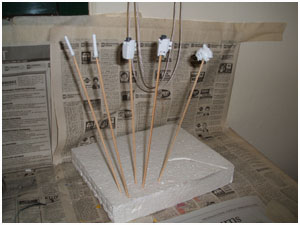
Take a piece of Styrofoam so you can stick all the pieces upright for drying later on. There are other alternatives such as metal containers, etc.
 Step
5:
Step
5:
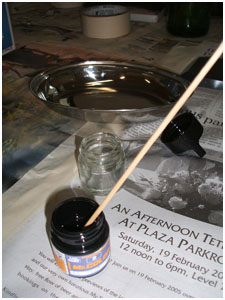
Time to prepare the paint. Make sure you buy the
correct type as well as the correct color, as it's pretty troublesome once you
make a mistake from this point on. As for the thinner it is recommended that you
get the hobby thinners from hobby stores, but I've been using the commercial
thinners since day one and it's working pretty much ok for me. I was told that
the hobby thinners would make the model kit last longer, and models made using
the commercial thinners would fade in time. But I still choose the cheaper
alternative, which would definitely be the commercial ones.
You can use an empty paint bottle to create the new
mixture of paint. Use around 1/3 of paint to 2/3 of thinner. Use a dropper to
aid you in this. This is just a rough gauge, but using more will mean
your layer of paint would be thicker, and using too little
might damage your kit due to the erosive nature of thinner on plastic. Thus,
always do a test on waste plastic before diving straight to spraying your parts.
Remember to mix the paint and the thinner well.
 Step
6:
Step
6:
Pour the mixture into your air brush. Remember to cover
up the rest of the paint should there be any remainder. Cover up the lid of the
air brush, to prevent the paint from spilling out during movement. Remember to
set the settings on your compressor, depending on how much pressure you want.
Also set the setting on your air brush, which will limit how much paint (the
size of the nozzle) can be released at one go.
Try to get a facial mask if possible, those which doctors/nurses use. It'll do
you good in the long run as you won't be breathing too much paint or thinner
when spraying. As mentioned above, always do a test on waste plastic before
spraying on an actual piece.
 Step 7:
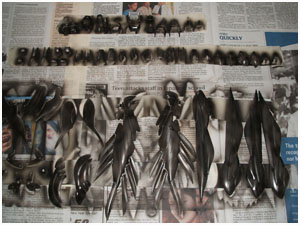
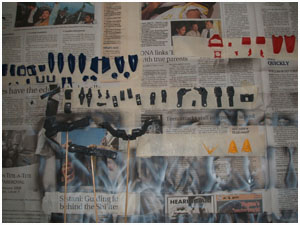
Proceed to spray all the pieces black. Take note you can also only spray the
white pieces black only, which is what I did. White is the easiest to show the
shadows, and is also the primary color in Wing Zero.
Don't worry too much about making mistakes for this step. The black does not
need to have any shades or tones, so just go through all the pieces one by one.
Important: Focus on all the grooves and edges, as well as pieces which have to
be darker, for example the inner sides of the arms, wings, etc.
Step 8:
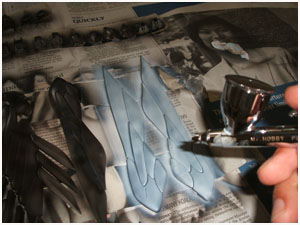
After all the under coats have been sprayed, you can
now proceed with the actual colors. Tip: Start from the lightest color and work
you way towards black. Rationale being any residue left in the air brush would
be harder to notice when you go on to the next color.
This step is also one of the hardest in modeling, because you will need both
skill and experience in getting the tone and shading correct. You'll find that
even a small degree of difference in number of layers/amount of paint, or even
the angle of your brush strokes is going to make a big difference. It sounds
hard, at first and it is hard, but you'll get better in time given more practice
and the virtue of patience.

Step 9:
You can now proceed with the rest of the colors. Once
all the parts are done, lay them out in sequence so that you will have an easier
time assembling them.
Remember to let them air for a while to allow the paint to dry. Wouldn't take
too long unless you're using very think paint.
Step 10:
Time to add in the panel lines. Get a fine oil based Gundam Marker. Draw in the
lines around the parts which have grooves in them, and take extra care around
important parts such as the face. Most of the obvious panel lines should be
already there, due to the black undercoat of paint done previously.
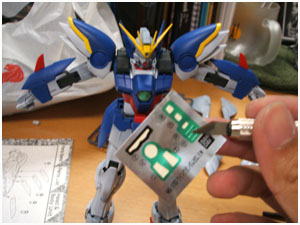
Next, use a sharp hobby knife to apply the decals. Knowledge of basic hiragana
and futagana helps a lot.
Step 11:
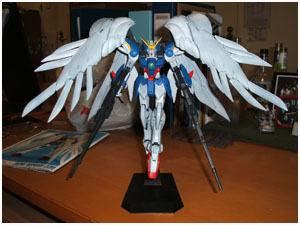
Finally, give that Gundam a nice pose and you're done!
Of course, this guide is a very very very basic one and there are a lot of other
steps which you can take to enhance the look of your Gundam.
However, I hope this guides serves it's purpose of introducing to you what an
air brush and a little bit of effort can do. For model kit fans, try and save up
and get a good compressor and air brush. I've never regretted getting one and
I'm sure you won't too.
Some of my other works: